???? 
|
Пользователи | Конкурсы | Статьи | Ссылки | Фото камеры | Доска объявлений | Теги |
| Главная Стартовая |
Пользователь: ?
guest( Войти |Регистрация ) |
|
Сборные слои Контуры Cropping Инфракрасный Liquify Ретуширование Корректор Рисование Plastering |
Repairing an imageHealing brush strategies The following example illustrates how you can use the healing brush and patch tool to solve a rather more complex retouching problem. Although the healing brush and patch tool are natural candidates to use here, I need to plan carefully how they will be used, as I will also need to rely on the clone stamp tool to do some of the preparation work, in particular where the edges of the selection to be healed extend to the edge of the document bounds. 
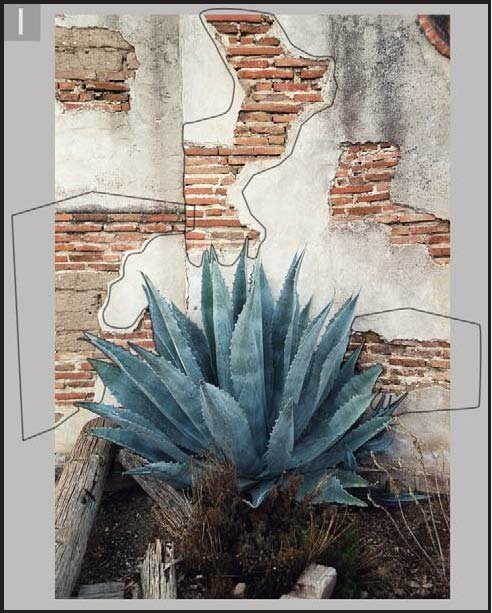
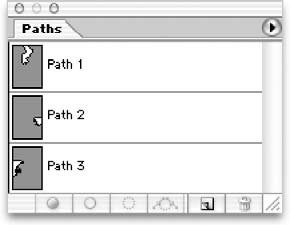
1 Let us consider how we would go about covering up all the exposed bricks in the picture opposite, so as to match the remaining plaster work. Some of these areas are too large to use the patch tool in one operation. Notice how I prepared three paths to define some of the areas to be repaired, which closely follow the outline of the cactus leaves.These will be used in the following steps. To begin with, I converted Path 2 into a selection by dragging the Path 2 palette icon down to the Make Selection button in the Paths palette. 
Adobe Photoshop 7.0 for Photographers 
3 I could try selecting the healing brush and attempt to sample some of the plaster texture to fill in the remaining gap. In this and the other sections to be repaired, the area to be covered up was so large that I decided to create a new pattern based on a small selection of the image. I made the Background layer active and chose Pattern Maker from the Filter menu. I then marquee selected a small area as shown here. 2 I then used this selection to copy the pixels to make a new layer. Choose: Layer > New > Layer via Copy (Command/Ctrl+J). I clicked on the Lock Transparency box in the Layers palette and selected the clone stamp, and was then able to clone some of the pixels in the image to provide a wall textured border edge on the left and the right. I did this in order to provide the healing brush or patch tool some edge pixels to work with. If I don’t do this, Photoshop will try to create a patch blend that merges with the cactus leaf colors.  
Repairing an image 
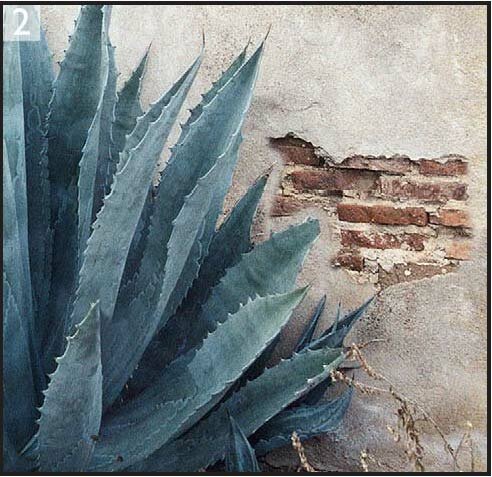
4 I made the tile area fairly large – 600 pixels square in this example, and I set the Smoothness setting to 3. If I click on the Generate button at the top of the dialog, the Pattern Maker will generate a randomized pattern that is a wraparound texture.The result of which is previewed in the dialog. I didn’t need to click OK as this will apply the texture as a fill to the current image. Instead I clicked on the Save Preset Pattern button at the bottom of the dialog. Once I had named the new pattern, it was appended to the other Pattern presets. 5 I then activated Layer 1 again, selected the patch tool and drew a rough selection of the plaster wall area I had just prepared as shown in this close-up image. 
Adobe Photoshop 7.0 for Photographers 
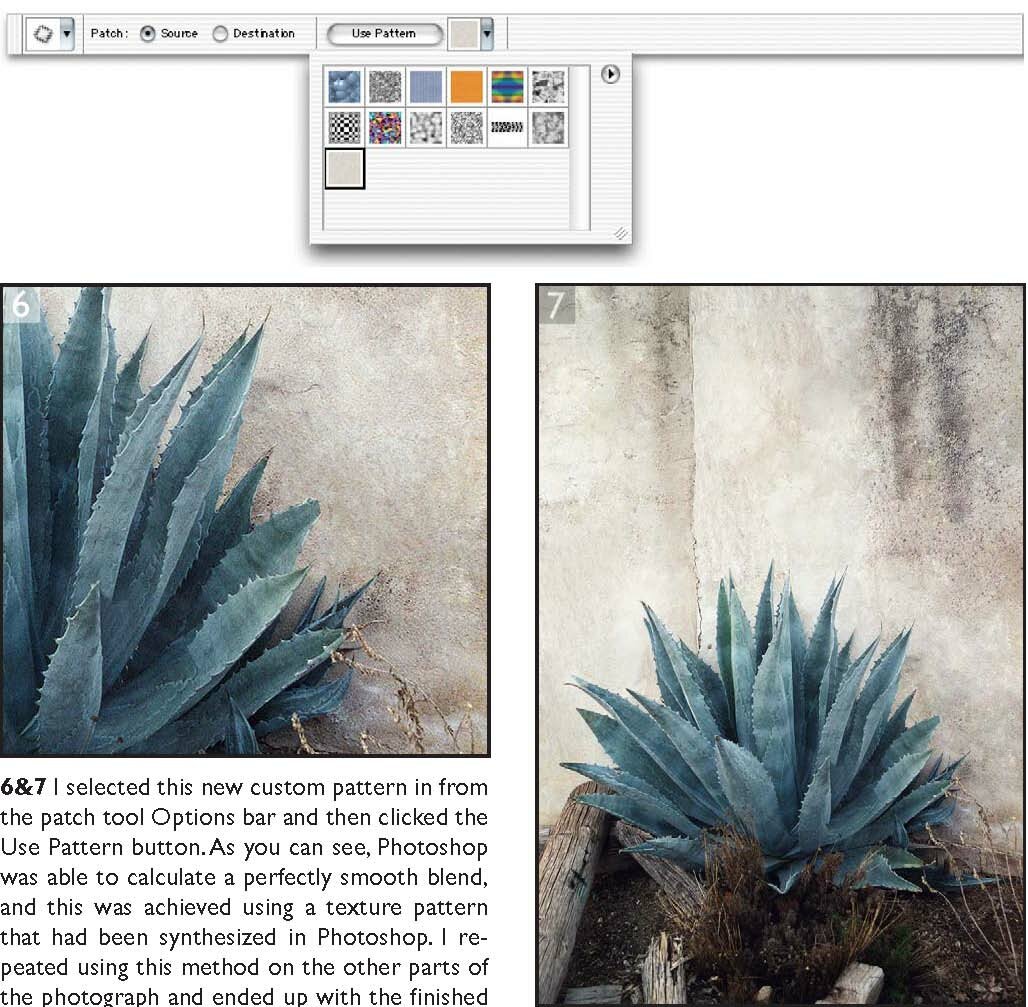
6&7 I selected this new custom pattern in from the patch tool Options bar and then clicked the Use Pattern button. As you can see, Photoshop was able to calculate a perfectly smooth blend, and this was achieved using a texture pattern that had been synthesized in Photoshop. I repeated using this method on the other parts of the photograph and ended up with the finished result seen here. |
|
Сообщений: 1258 Пользователей: 2693 Приветствуем: Похудеть http://morganvi Гости: 4 Зарегистрированые: 0 |
Все работы размещенные на сайте принадлежат их авторам, любое использование материалов сайта с обязательной обратной ссылокой. |
ICQ?207238348 |